Wednesday, October 10, 2012

Garlic Brown Sugar Chicken

Oh Pinterest, you post recipes that look and sound delicious....and then you make me do something that completely ruins the hope for the deliciousness to live up to my expectations, like cook chicken breast at 500 degrees. sigh.

Well, I knew this recipe was flawed when I read through it, but for the sake of keeping the test kitchen true to it's roots, I decided to give the recipe the benefit of the doubt and assume that whoever wrote it knew something I didn't (not too hard to imagine that would be true, right?).   The result was some well flavored rubber chicken that was, literally, hard to swallow.

So, here you go pinterest world. I made this mistake so you don't have to!

Link to Pin: http://pinterest.com/pin/103793966383043581/
Link to Actual Recipe: http://www.food.com/recipe/easy-garlic-chicken-5478

4 boneless, skinless chicken breasts
4 garlic cloves, minced
4 tablespoons brown sugar
3 teaspoons olive oil

HERE's WHERE IS ALL WENT WRONG:
Directions
Preheat oven to 500 degrees and lightly grease a casserole dish
WARNING- if you cook chicken at 500 degrees it actually turns into a rubber chicken! DO NOT serve rubber chicken... PREHEAT YOUR OVEN TO 350 DEGREES.

In a small saute pan, saute garlic with the oil until tender, remove from heat and stir in brown sugar.
Place chicken breasts in a prepared baking dish and cover with the garlic and brown sugar mixture.

Add salt and pepper to taste, bake uncovered  for 25-30 mins  (original recipe said 15-30 minutes, a 15 min. cook time window is pretty catastrophic for people who like to follow a recipe exactly!)

It's hard to review this one since I cooked it with the 500 degree method but I will say the flavor was great and if I made it again following my revised recipe above, I think it would be a great weeknight chicken dish!! If you make it, let me know your thoughts!!


Sausage Rolls

Another Saturday morning standing hungrily in my kitchen and rummaging through the fridge led me to whip up these easy sausage rolls. Seriously all you need is crescent rolls, cooked sausage and some cream cheese and this is done!

Link to Pin: http://pinterest.com/pin/103793966383181877/
Link to Recipe: http://abiteofmylife.blogspot.com/2009/02/cream-cheese-sausage-pinwheels.html (use this link for the recipe, she's got great step by step instructions with photos.


Cream Cheese Sausage Pinwheels
1 Roll Breakfast Sausage
1 Tube Pillsbury Crescent Rolls
1 Pkg Softened Cream Cheese

Brown sausage and drain.
In a large bowl, combine cooked sausage with softened cream cheese. Remove crescent roll dough from packaging do not separate sections, and roll out into a rectangle, sealing the perforated areas with your fingers.
(the only pic I remembered to take...oops)
Spread the cream cheese mixture over the dough in a thin even layer. Roll the dough lengthwise (if you roll from the short side- the pinwheels will be fatter- but you wont get as many!)
Once rolled up- refrigerate for at least 20 mins- or if you are in a hurry like I usually am, put it in the freezer til' firm... this will help the dough keep shape while cutting
Cut in about 1/4" sections and lay on baking sheet. Bake for about 15 mins or until crescent roll is cooked.

Ingredient Availability-10
 I keep crescent rolls on hand at all times, and who doesn't stock cream cheese and sausage??
Ease on the Waist Line-5
Enjoy in moderation :)
Prep Mess-8

very little mess
Overall Difficulty-EASY
Overall Taste- 8
My friend made a different version of the same thing for a brunch at MOPS and it was better...I'll try and figure out which pinterest recipe she used!
Hubby Rates It-8
Great little brunch food item, and it's got sausage...man food.
Ease of Clean Up-8

No "Cream of"Chicken and Wild Rice Casserole

Well, hello blog world. Let me start by apologizing for my delay in posting yummy recipes lately. I have been a little absent from posting due to sick babies, surprise parties, trips to Dallas etc., but have no fear, people in my family still have to eat so I have been cooking!! Hopefully I'll be all caught up by Sunday so check back for updates.

Last week, I decided to try the chicken and wild rice casserole which claimed to have no "cream of whatever"soups in it, thus giving the impression that it was a healthy casserole. Let me assure you, this puppy is still loaded with cheese saucy good-ness, so really I'm not sure it's any healthier, but maybe just a little messier to make since you can't just pop a can of cream of chicken soup for the sauce :)

Here's the rundown.
Link to Pin: http://pinterest.com/pin/103793966383258210/
Link to Actual Recipe: http://picky-palate.com/2010/09/13/cheesy-chicken-and-wild-rice-casserole/


Ingredients
3 Tablespoons extra virgin olive oil
1 medium onion, finely diced
3 stalks celery, finely diced
3 carrots, peeled and diced
2 Tablespoons fresh minced garlic
2 Cups shredded, cooked chicken breast*
2 Cups steamed white rice*
16 oz prepared wild rice *
1 teaspoon kosher salt
1/2 teaspoon black pepper
1/4 teaspoon garlic salt
** Please note that all three of these ingredients are pre-cooked...so you've got to cook the chicken and the 2 rices before you can make this recipe. If you don't this the day before, your stove top and your kitchen timer can get pretty messy!!!
______
Cheese Sauce
4 Tablespoons butter
1/4 Cup all purpose flour
1/4 teaspoon kosher salt
1/4 teaspoon black pepper
2 Cups chicken broth
2 Cups shredded cheddar cheese
Top with 1 1/2 Cups shredded cheddar cheese
1.  Preheat oven to 350 degrees F.  Heat oil into a medium dutch oven or pot over medium heat.  Saute onion, celery and carrots until softened, about 10 minutes.  Stir in garlic and cook for 1 minute.  Stir in chicken, both rices, salt, pepper and garlic salt.  Reduce heat to low.
2.  To prepare cheese sauce melt butter into a medium saucepan over medium high heat.  Whisk in flour, salt and pepper then slowly pour in chicken broth whisking continuously.  Whisk until thick and nearly boiling then stir in cheese until melted.  Pour cheese sauce into rice mixture then transfer to a 9×13 inch baking dish. Top with additional cheddar cheese and bake for 25-30 minutes or until cheese is melted through.  Serve.
cheese sauce in progress

Right before it went into the casserole dish
Ingredient Availability-7
I did have to go the grocery store (I don't have wild rice in my pantry) but everything was pretty straight forward and easy to find.
Ease on the Waist Line- 3
Two words...CHEESE SAUCE!
Prep Mess-1
seriously, like 12 pots and my crockpot and a casserole dish were required to cook all of this!
Overall Difficulty-Medium
Just because of the labor intense prep process...it's hard to juggle all of that at once...oh and I consider making a sauce a medium level difficulty cooking skill!
Overall Taste- 8
Despite the frustration of making this casserole, it was pretty good! I actually looked forward to eating the left-overs the next few days which is really the measure of a good recipe for me!
Hubby Rates It-8
As far as man food goes, he loves cheese, rice and chicken so this was a winner with the hubs.
Ease of Clean Up-2

See this giant mess.... zero fun to clean up!


Wednesday, September 26, 2012

Roasted Cauliflower

I know you probably saw cauliflower and decided to skip this post, but don't! This was actually a pretty tasty, spicy little side and  recipe I would try again!


Actual Recipe:

Ingredients
  • 1 large head Cauliflower
  • 3 cloves garlic, minced
  • 1 Tbsp Red New Mexico Chile Powder (substitute Ancho Chile Powder if you don’t have Red New Mexico)
  • 1/2 tsp crushed dried Red Chile
  • 1 tsp Cumin seeds toasted and ground
  • 4 Tbsp Olive Oil
  • 1/4 cup Cilantro leaves, chopped
  • 1/2 Lime, juiced
  • Salt to taste
** I substituted regular chile powder for Red NM Chile Powder and ground cumin for the seeds. I never like to buy an expensive spice I will only use once!
Instructions
Preheat oven to 325 F. Separate the florets from the Cauliflower.  Put them in a bowl with the garlic, chile powder, crushed chile, cumin, salt & olive oil and toss gently to mix together and coat well. Spread the seasoned Cauliflower in a shallow roasting pan. Roast 1 to 1-1/2 hours or until tender, stirring occasionally. Dress with lime juice and stir in chopped cilantro and serve.

Ingredient Availability-3
The original recipe is full of unique ingredients I don't keep on hand, but there are pretty reasonable, simple substitutions you can make (as noted above)
Ease on the Waist Line-10
This is super healthy and quite spicy!
Prep Mess-7
Very little to clean up
Overall Difficulty-EASY
Overall Taste- 6.5
Pretty good for a veggie but a little too spicy for my taste. I'll have to reduce the amounts of red pepper and chile powder next time.
Hubby Rates It-6
When I asked him this, he asked if he should rate it based on how it was for cauliflower or compared to anything else he wanted to eat...he came up with 6. So, hubs doesn't like cauliflower...good to know.
Ease of Clean Up-7

Before


All Seasoned up

Out of the oven

Add cilantro and lime

Serve it up!

On the plate with sweet and spicy chicken!

I served this with Spicy Honey Chicken so it was an overall spicy night at our table! I'll review that recipe soon!

A Quick Note on Ranch Dressing

I have seen this post floating ALL OVER my Pinterest lately....

"I love ranch, but it's not so good for you, until now. This whole jar of ranch is only 1.75 grams of fat and 255 calories! 1 cup dannon oikos plain greek yogurt, 1 packet hidden valley ranch mix, 1/2 cup 1% milk. Whisk together, chill 1 hour before use. Perfect consistency and tastes better than bottled!"


I tried it- it WAS NOT as good ranch made with mayo and had a really bitter taste. I added in some miracle whip which almost made it edible but I won't be doing it again.  If you're going to have ranch, just bite the bullet and have ranch... just my thoughts.


Sweet Pepper and Sausage Pizza

We had a Sunday night- pizza night tradition when we lived in Dallas. I love pizza. Like the "I'm pretty sure my neighborhood Papa John's is feeling the revenue hit because we moved" kind of love for pizza. I actually debated whether I wanted to proceed with building our home out here once I realized there were no pizza delivery options. AT ALL.

So, for awhile, we have been trying different brands of frozen selections, and though Digiorno comes closer than any other to tasting anything like my beloved Papa's, it just wasn't cutting it. Desperate times call for desperate measures so I scoured pinterest for a homemade pizza option and found this little beauty.
Pin:http://pinterest.com/pin/103793966383284271/

Now, this recipe involved a homeade crust...and when I started craving pizza on Sunday afternoon, I just didn't feel like I had the patience or self-control to watch dough rise for 2+ hours....so I pretty much LOOSELY used this recipe as an inspiration for toppings and made my own version.

Here's a link to her recipe:http://joythebaker.com/2012/09/spicy-sausage-and-sweet-pepper-pizza/

Here's what I did:
(makes 2 pizza's)
2 Boboli ready made pizza crusts
3 packets Boboli ready made sauce (this has a little bit of sweetness to the flavor, much like PJ's)
1 package hot pork sausage
1 package mile pork sausage
2 red bell peppers
2 yellow bell peppers
LOTS of Mozzarella and a little parm. cheese

Crumble the sausage and cook in a deep skillet until browned (fully cooked,no more pink showing)
Drain on a plate with paper towels
Wash peppers and remove core and seeds. Slice peppers into long strips
Layer crust with sauce, cheese, toppings, more cheese
Follow baking instructions on the crust package
DEVOUR!!

This was actually pretty amazing pizza for using store bought crust and sauce and so easy to throw together on a Tuesday night.  So glad I made 2 and can't wait to eat our leftovers later tonight! I served this with a little green salad and tried out the "ranch dressing made with greek yogurt thing." I'll write another post about that...

Official Numbers (even though this wasn't an official, by the book Pinterest recipe)


Ingredient Availability-7
Easy to find but all specially purchased for this dish
Ease on the Waist Line-4
It's pizza....and sausage...so it's awesome...but
Prep Mess-8
very little mess
Overall Difficulty-EASY
Overall Taste- 9.5
Loved this. Will definitely make again
Hubby Rates It-9
He's not a pepper fan but he actually didn't pick them all off!!
Ease of Clean Up-8

Sorry I don't have pics of this! I will add some next time I make it...maybe tomorrow...maybe tonight...mmmmmm...pizza....


Saturday, September 22, 2012

Kale Salad with Maple Poppyseed Dressing

Let's be honest, this is a dressing recipe. No one wants to eat kale, but the "super food" boasts so many health benefits that if you can find a way to choke it down, it's definitely worth it. This dressing was definitely pretty good and made the kale almost tasty...until you get to the texture and feel like you're eating straight from a tree with the leafy, grassy....anyway, this was supposed to be about the dressing!

Link to Pin:http://pinterest.com/pin/103793966383239760/
Link to Recipe:http://www.simplebites.net/two-simple-salads-for-winter/ (there's another salad at this link too, but it had zero appeal to my taste buds so you will not see me reviewing it!)

Recipe
  • 1 bunch kale, washed and dried
  • 1 teaspoon Dijon
  • 1/4 teaspoon salt
  • 1 Tablespoon maple syrup (or honey)
  • 2 Tablespoons apple cider vinegar
  • 1 Tablespoon lemon juice
  • 1 clove garlic
  • 1 Tablespoon poppy seeds
  • 1/2 cup extra virgin olive oil
Method:
In a small glass jar, combine Dijon, salt, maple syrup, vinegar, and lemon juice. Finely chop garlic or grate with a microplane and add to the jar. Top with lid and shake well.
Add poppy seeds and olive oil, cover and shake well. Refrigerate until ready to use. May keep up to three weeks if kept chilled.

May I take a moment to introduce my sous chef?? 
Tear kale, toss with dressing and add dried fruit or nuts or other desired add-ins.


Isn't he the most talented sous chef you've ever seen??

I added in a little of this.


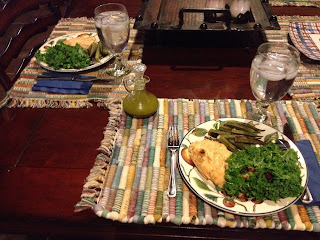
The finished table- see tiny dressing bottle!
Ingredient Availability-7
I had to buy pure maple syrup and a few other things that weren't normally on hand in my kitchen
Ease on the Waist Line-8
This number varies based on the amount of dressing you use!
Prep Mess-9
Hardly any mess at all
Overall Difficulty-EASY
Overall Taste- 5
This would be a good dressing on another type of green- I just really didn't like the kale!
Hubby Rates It-2
Is anyone surprised?
Ease of Clean Up-8


Cheesy Zucchini Rice

YAY! Two hit recipes in one week...way to go pinners!! Keep the good ones coming!

One night this week, we had some left over meat to eat so I decided to make this cheesy side dish to go along with it!

This recipe was a hit!!! I mean, what's not to love about cheese and rice with hidden veggie's inside?

Link to Pin:http://pinterest.com/pin/103793966383043630/
Link to Recipe:http://bunsinmyoven.com/2012/06/28/cheesy-zucchini-rice/

Ingredients

  • 1 tablespoon olive oil
  • 1 cup long-grain white rice
  • 2 cups chicken broth
  • 2 tablespoons butter
  • 1 medium or 2 small zucchini, grated (I used my food processor but a cheese grater would work well, too)
  • 1 cup shredded sharp cheddar
  • 1/2 teaspoon garlic powder
  • salt and pepper, to taste
  • splash of milk, as needed
Instructions
  1. Heat the olive oil in a medium sauce pan over medium heat.
  2. Add the rice and stir to coat. Toast the rice, stirring often, just until it starts to turn golden.
  3. Pour in the chicken broth, bring to a boil, turn heat to low, and cover.
  4. Cook, covered, for 15 - 20 minutes or until most of the liquid is absorbed.
  5. Remove from the heat and add the butter, grated zucchini, cheddar, and garlic powder. Stir until well incorporated. Cover and let sit for 5 minutes.
  6. Stir again and add salt and pepper to taste and a splash of milk if you'd like to thin out the texture a little bit.

Ingredient Availability-10
Ease on the Waist Line-6
Veggies give it a few points, but really it's cheese and rice with a little green :)
Prep Mess-7
Pretty easy to prep- one dish and a grater!
Overall Difficulty-Easy
You can do this one! Follow the directions exactly and it will turn out well!
Overall Taste- 9
I'm a sucker for cheesy broccoli casserole and this was as good or better!
Hubby Rates It-9
We hardly had any left, and it was just the two of us!
Ease of Clean Up-7

My only possible suggestion on this would be to use mild cheddar instead of sharp. The sharp cheddar was a very strong flavor and kind of overpowered the freshness of the zucchini! 

Shredded Zucchini

The finished deliciousness...I think I'll go eat some leftovers now...all these pics are making me hungry!

Enjoy!!

Chicken and Dumplings

This recipe is pinterest test kitchen tested, mother and mother-in-law approved! For the sake of full disclosure, I have to admit that I pinned this one quite awhile back and I have made this recipe a few times. It is always a hit, but also always comes out  little differently than the time before. I've made it for the hub's when it was cold outside, for my mom while she was recovering from knee surgery, and this week I took the leftovers to my mother-in-law who, in some strange cultural confusion, is the only one in her family who likes chicken and dumplings. All of them have enjoyed this dish, and, GET THIS, MY MOM asked ME for the recipe after she tried it. Maybe you don't understand why that's a big deal, but trust me, as the daughter of a a home economics major, this speaks volumes.

So here you go- I definitely recommend that you try this one!
Link to Pin: http://pinterest.com/pin/103793966381579448/
Link to Actual Recipe: http://eatathomecooks.com/2009/07/homemade-chicken-and-dumplings-its-easy-really.html

Original recipe with my adaptations:

about 3 cups cooked chicken**
6-8 cups chicken broth
2 cups flour
2 Tbs. butter
1/2 tsp. baking powder
salt to taste (I just shake some in)
about a cup of milk
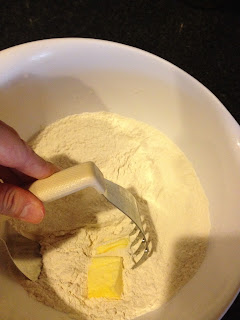
In a bowl, combine the flour, baking powder and salt.  Cut the butter into the dry ingredients with a fork or pastry blender.  Stir in the milk, mixing with a fork  until the dough forms a ball. 
If your dough is too flaky or not forming a ball, add tiny splashes of milk until it sticks!
Heavily flour a work surface.  You’ll need a rolling pin (or some adaptation of a rolling device) and something to cut the dumplings with.  I used a rubber knife but a pizza cutter also works!  
Roll the dough out thin with a heavily floured rolling pin.  Dip your cutter in flour and cut the dumplings in squares about 2″x2″.  It’s okay for them not to be exact.  Just eye ball it.  Some will be bigger, some smaller, some shaped funny.
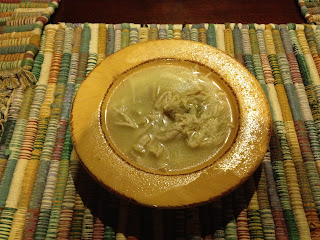
To cook them, bring the broth to a boil.  Drop the dumplings in one at a time, stirring while you add them.  The extra flour on them will help thicken the broth.  Cook them for about 15-20 minutes or until they not doughy tasting.  Add the cooked chicken to the pot and you’re done!


** My favorite way to get the "cooked chicken" step taken care of is to use chicken breasts in the crock pot. I throw them in (sometimes frozen, sometimes thawed) with some celery tops, chopped onion and whatever seasoning I'm feeling (season salt, lemon pepper, garlic powder, whatever). I add water to cover the chicken and cook on low for 6-8 hours or high for 3-4. Shreds with a fork and you can also use the liquid as homemade chicken broth!
In the crockpot- just strain out the veggies and you've got natural chicken broth! WAY better than the store bought!
Ingredient Availability-8
Pretty simple, basic baking ingredients+ chicken and broth
Ease on the Waist Line-6
I don't think you can really call anything with "dumplings" in the title healthy, but it's soup, so that's not that bad :)
Prep Mess-4
Anytime you have to heavily flour a surface, there's gonna be a mess! And this requires a lot of kitchen gadgets (pastry cutter, pastry knife, rolling pin etc.)
Overall Difficulty-Medium
I've found that overall, making dough is not the easiest thing to do, but this recipe is definitely do-able for most!
Overall Taste- 9
This is a delicious taste of home....I love it when I'm sick, in cold weather, or anytime! Good ole, traditional comfort food!
Hubby Rates It-9
He is always game for this recipe!
Ease of Clean Up-4
Again, lots of gadgets to clean up, but worth it!


Tuesday, September 18, 2012

Roasted Okra

As we speak, I'm currently cooking up another pinteret recipe to review and share but I had a few minutes to burn so thought I would write and quick and simple review of a quick and simple recipe: Roasted Okra.

My Pinterest account is not allowing me to view my boards right now (there's a conspiracy theory in the back of my mind that someone at Pinterest is trying "Zuckerberg" my blog idea), so I did a search and found it floating around on someone else's Pinterest space...
Link to Actual Recipe:http://allrecipes.com/recipe/roasted-okra/#

Recipe:

Ingredients

  • 18 fresh okra pods, sliced 1/3 inch thick
  • 1 tablespoon olive oil
  • 2 teaspoons kosher salt, or to taste
  • 2 teaspoons black pepper, or to taste

Direction
Preheat an oven to 425 degrees F (220 degrees C).
Arrange the okra slices in one layer on a foil lined cookie sheet. Drizzle with olive oil and sprinkle with salt and pepper. Bake in the preheated oven for 10 to 15 minutes.


Always wash you veggies first!!


Accuracy of Recipe- 10
It's hard to mess up olive and salt and pepper to taste....
Chop off the stems


Toss with olive oil and salt and pepper (or do it as the recipe states...do as I say, not as I do!)

Ingredient Availability-10
I like that it used very few ingredients and I found fresh, locally grown okra at the store. It's in season, get it while it lasts!
Ease on the Waist Line-10
Veggie- Good, Olive Oil- Good. Paleo and human diet friendly.
Prep Mess-9
Pretty much toss it in a bowl then put it in a pan
Overall Difficulty-EASY
Again, Okra, olive oil, salt and pepper to taste...if you can't do this one, you might want to retire from kitchen experiments and try watching Top Chef Masters for your foodie fix.
Overall Taste- 7
I really like okra, and this tasted like good okra. I do have to say it is not "better than fried" or "just like fried" as claimed...come on people, you're not going to get okra better than fried!! Who are they kidding? Deep South folks, can I get an Amen?
Hubby Rates It-8
He liked it but would have preferred it a little crunchier (my fault, I didn't want it too crisp so took it out of the oven a little early.)
Ease of Clean Up-8

Overall, this is a great, healthy side dish to make while in season- if you really like crispier, make sure you use a roasting pan and leave in until it reaches desired crunchiness (but before it becomes "blackened"). 


More later....back to my current experiments!

Monday, September 17, 2012

"Melt in Your Mouth Chicken"

Because I often buy chicken breasts in bulk from my local discount warehouse store, I'm always on the lookout for a good weeknight chicken recipe. I've seen the "Melt in your Mouth" chicken recipe all over Pinterest and thought it would be a good recipe to test out early on the blog and, if it was great, might even become a staple meal for our house.

I'll start with the basics on this one...
Link to Pin: http://pinterest.com/pin/103793966383239617/
Link to Actual Recipe*: http://www.food.com/recipe/melt-in-your-mouth-chicken-breast-37336

melt in your mouth chicken breast: 
1/2 c parmesan cheese
1 c greek yogurt
1 tsp garlic powder
1 1/2 tsp seasoning salt
1/2 tsp pepper
spread mix over chicken breasts, bake at 375 for 45 mins

*It should be noted that Pin recipe calls for nonfat greek yogurt where the actual recipe calls for mayonnaise. I followed the pin instructions and used the yogurt.

Accuracy of Recipe- 4
I think this dish could be greatly improved by using less salt/season salt and reducing the cook time. I followed the recipe and my chicken was dry and overdone and very salty.
Ingredient Availability-9
I like that it used very few ingredients and none were rare or hard to find.
Ease on the Waist Line-7
The use of the non-fat yogurt really lightens up this dish from the mayo version. Also, the quantity of cheese used is very reasonable so I would guess this is a somewhat low-cal dish.
Prep Mess-8
I mixed all ingredients and coated the chicken in a ziploc bag so my cleanup was just tossing the bag and cleaning my casserole dish.
Overall Difficulty-EASY
The prep time for this was less than 5 minutes. Super easy weeknight option
Overall Taste- 5
Like I said, could have been greatly improved by a shorter cook time and less salt
Hubby Rates It-5
He expressed that it had potential but missed the mark
Ease of Clean Up-8

I would be willing to try this recipe again but it definitely needs some work.
MY SUGGESTIONS:
Reduce season salt to 1tsp
Reduce cook time to 30-35 minutes (maybe 25 if using thin chicken breasts). Check chicken for done-ness after 30 mins by cutting through the thickest part of the meat and making sure it is cooked through. Also, mix all ingredients in a ziploc bag and throw in chicken to coat. Transfer to your baking dish, then spread remaining mixture on top (pics below)


Ready for the oven


I served this with Roasted Okra and Kale Salad with Maple Poppyseed Dressing...reviews of these recipes coming soon!